
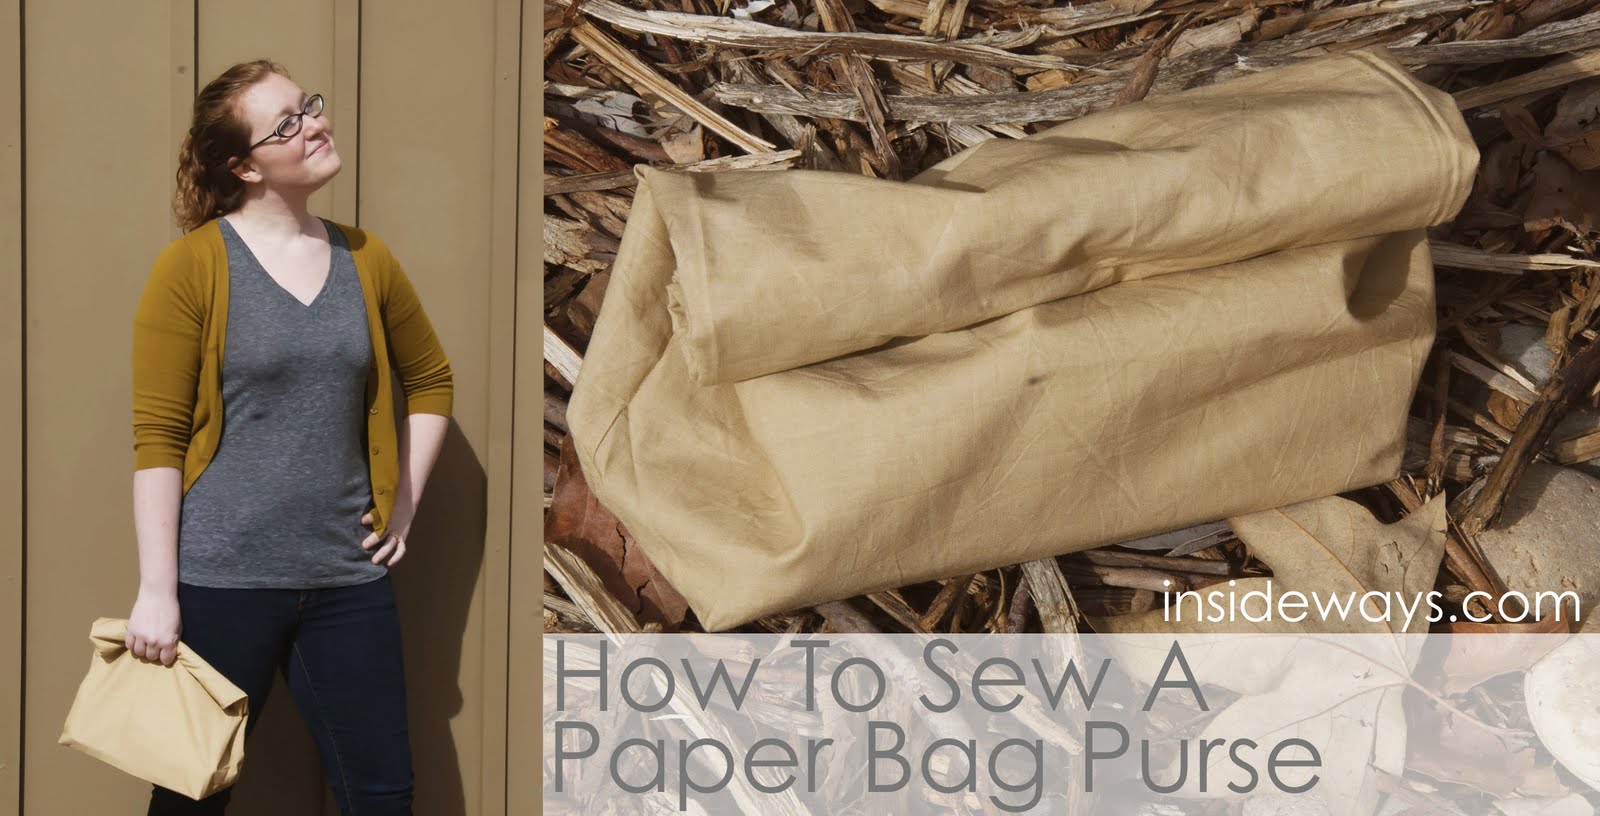
Since you might not have been able to make your way over to her blog (something you should fix right now), today I want to share little sewing project with you - an easy-to-sew little purse inspired by paper bag lunches and this Pinterest pin. This is a great project to try if you're just learning to sew, plus the little bag you'll end up with full of whimsy and nostalgia - my favorite style :)
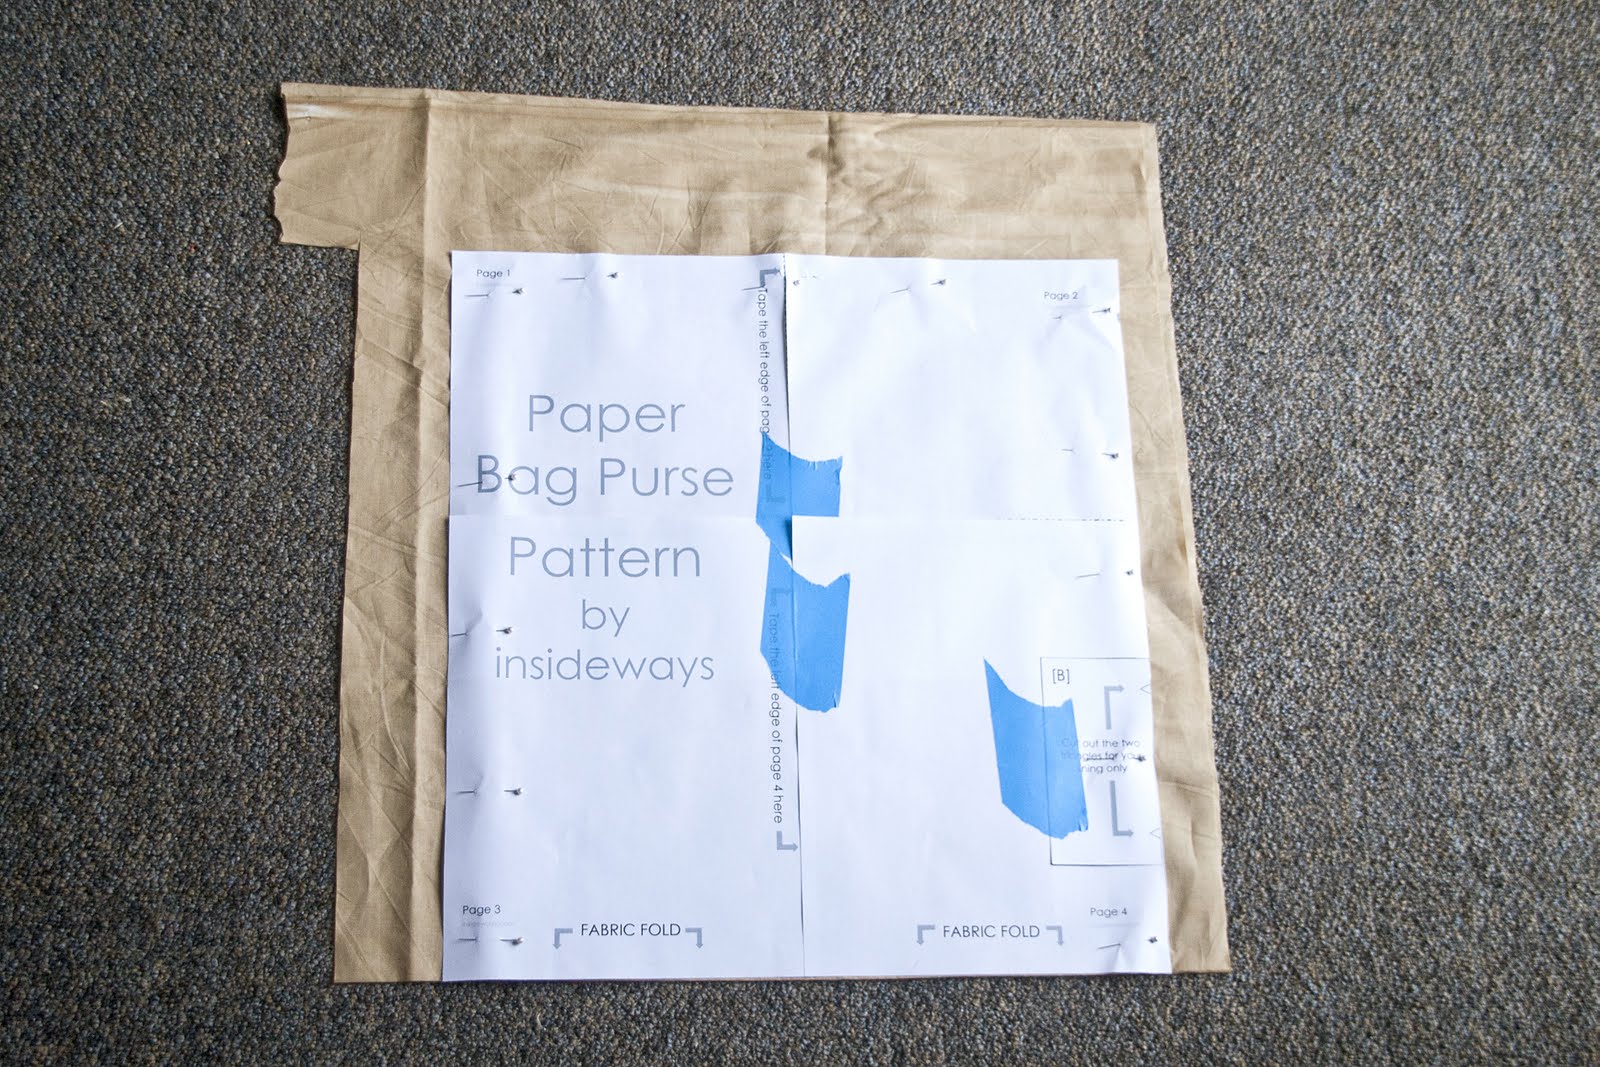
What you'll need: pattern printout (you can download it here), 1 yard of fabric (or 1/2 yards of fabric in two different colors), matching thread, and sewing supplies such as pins and scissors.
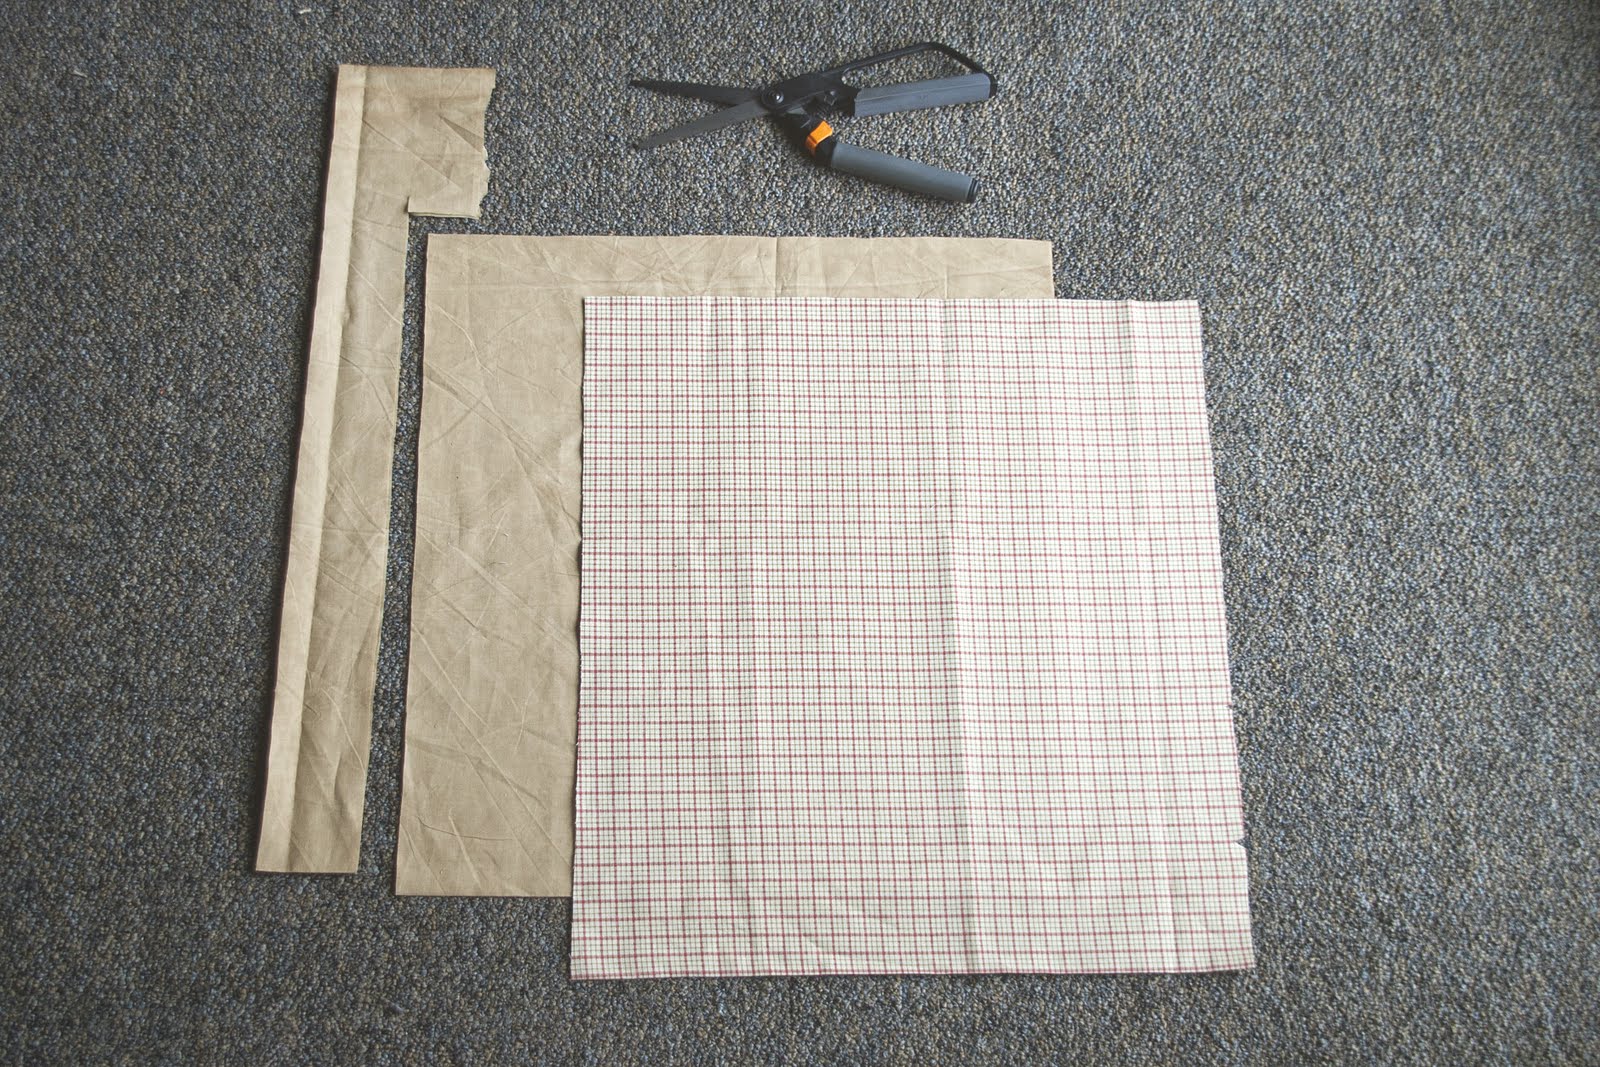
1. Fold your fabric in half and cut out a rectangle using the pattern. (Most fabric comes folded in half already. You can just use that fold - that's what I did!) Do this twice - one piece will be the outside of your bag and the other will be the lining. You can use a different color for your lining if you'd like.
(Be sure to cut out the two little triangles of piece [B] on your lining piece.)
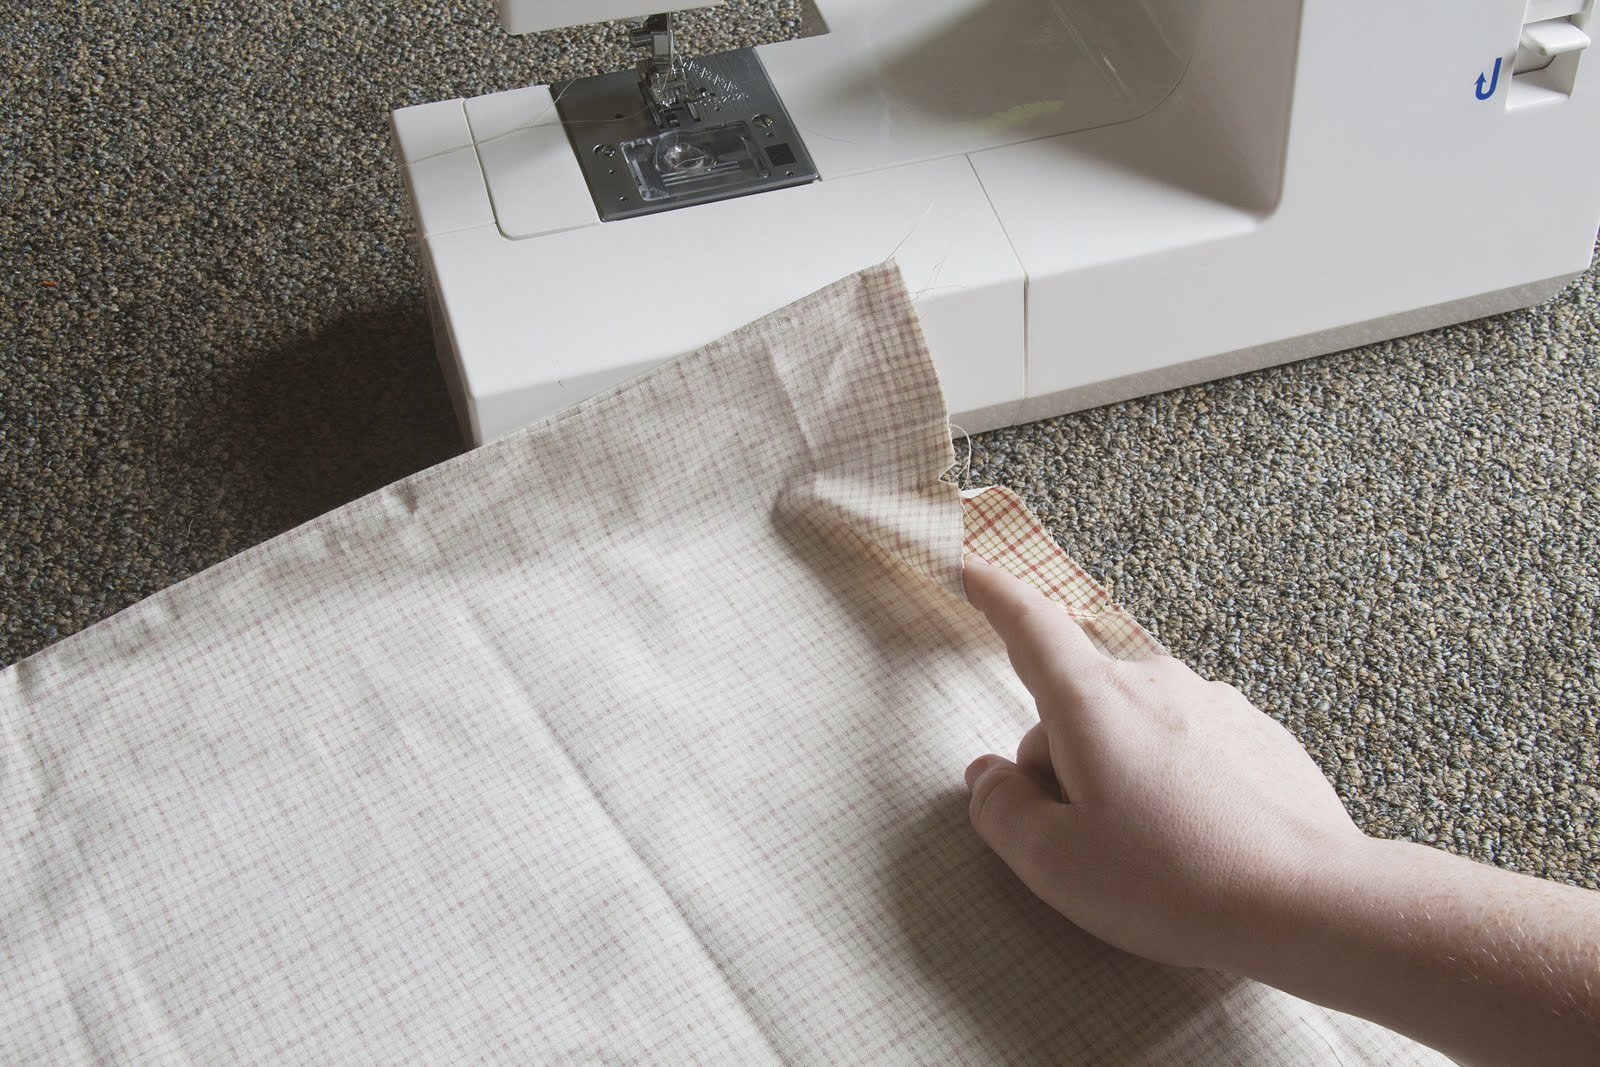
2. On your outer piece, pin the "right" sides of the fabric together and sew a seam down the left and right side with a 1/2 inch seam allowance.

Do the same thing for your lining piece, but leave a gap in your seam between the two triangle cutouts.
3. Fold your bottom left corner of your lining piece so the seam and fabric fold are on top of one another (as pictured below). Press your new corner flat and pin on the corner pattern piece.

Sew a seam on your corner with the edge of your sewing machine's foot touching the edge of the pattern. Repeat step 3 for the bottom right corner on your lining piece and for the two bottom corners on your outer piece.

4. Pin the top edge of your lining to the top edge of your outer piece with the "right" sides of the fabric together. What you end up with should look like a bag, but with all of the raw seam edges showing. Sew the lining to the outer piece with a 1/2 inch seam allowance.

7. Turn your bag right side out using the small hole between the triangle cutouts in the lining.

8. Hand stitch the hole in your lining shut.

9. Iron press the seams of your bag to make it nice and crisp. To add a few extra creases for a real paper bag look, fold your bag as if it were a grocery store paper bag and iron in all of the creases.

Voila! You have a little purse!

I love how cute my new little bag is, but the best part of this project is that it's such a basic pattern. Once you feel comfortable, you can add on to this design as much as you dare; handles, buttons, velcro, different patterns - the sky is the limit to make a bag that fits your needs and style!
Enjoy!!