

The idea for this project came from Tim’s supreme ability to compromise with me. I love letters. I like those metal or plastic letters you can just put somewhere (they sell them at Urban Outfitters or Anthropology for example) and I’ve seen pillows sewn into the shape of letters that I love.
Tim doesn’t like either of those things, BUT Tim likes scrabble. He came up with the idea of having a grid of over sized scrabble letters as an art piece in our living room. Great idea.
Here's how it went down!
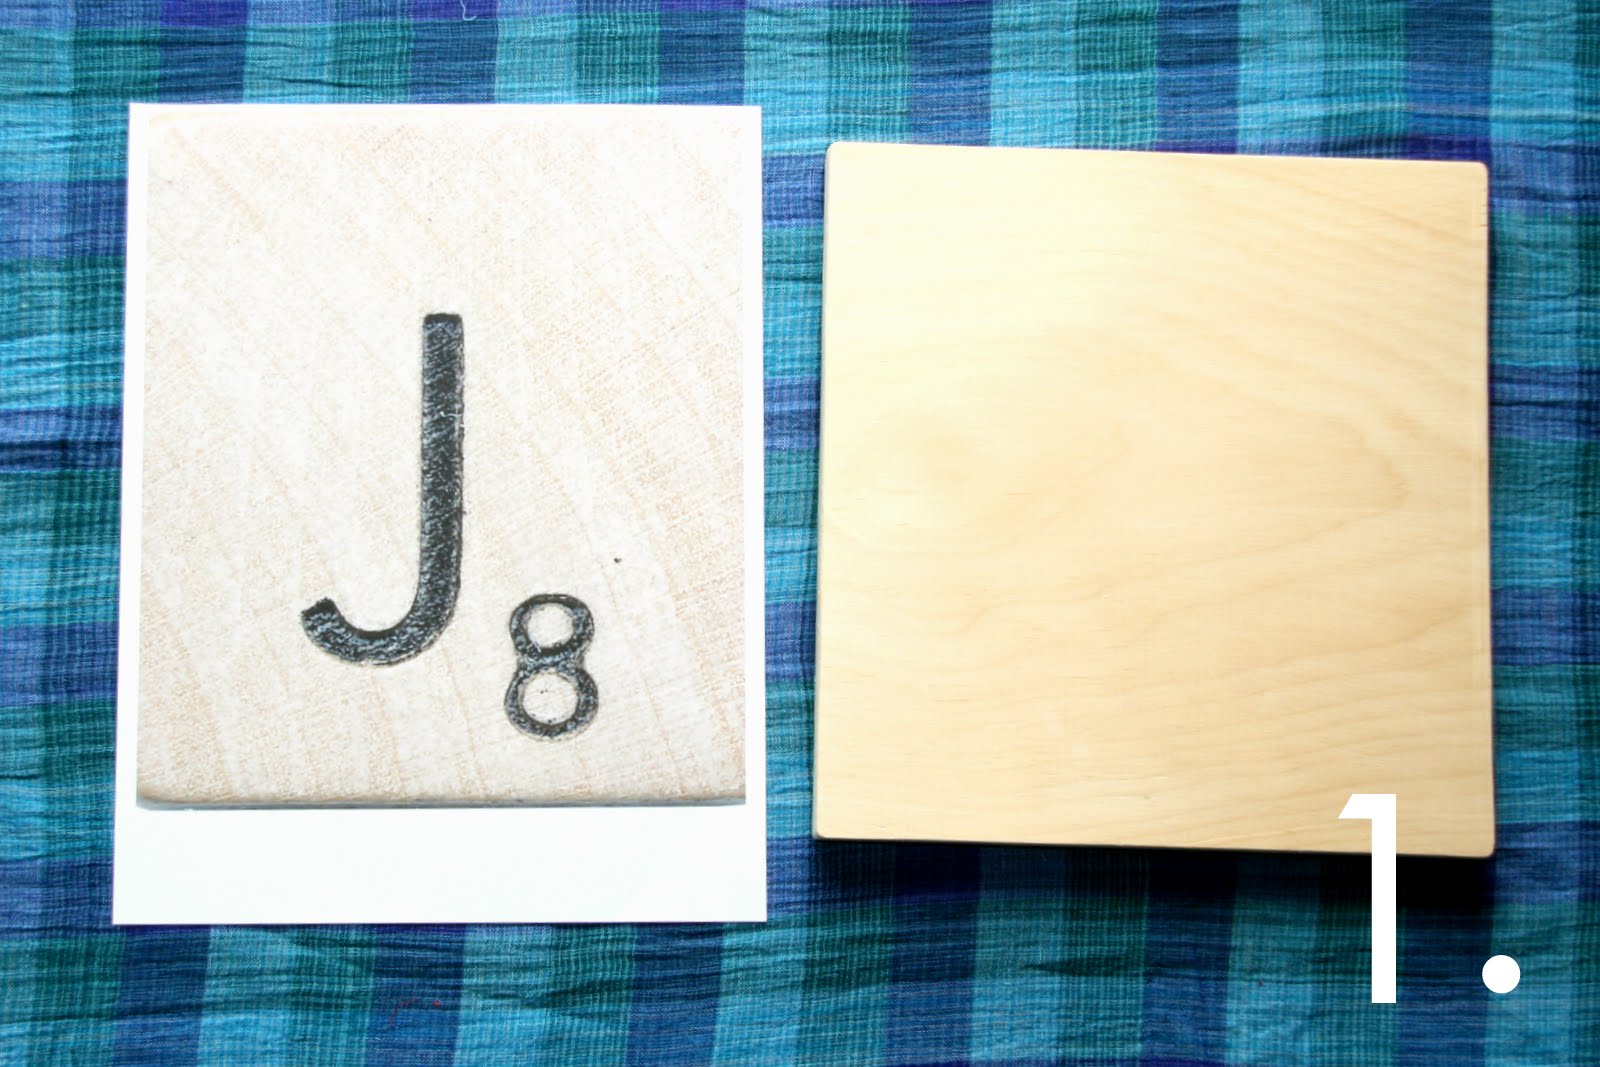

1. Cut wood squares (we used 9.5" x 9.5"squares cut for us from Home Depot) and sand the corners to make them slightly rounded, just like Scrabble tiles. Print out a high-res picture of the letter you would like in approximately the same size as the wood square. (I got my high-res image here.)
2. Scribble pencil on the back of your printed letter. You only have to scribble on the parts where the letter and number are. Basically, it turns the print out into homemade carbon transfer paper.


3. Put your printed tile (right side up) on top of your wood square.
4. Carefully trace the edges of the Scrabble letter and number. Push hard and try not to go outside of the printed black part. You'll end up with a light grey tracing of the Scrabble letter.


5. Paint the letter in with black acrylic paint. This could possibly take forever, but it's worth it :)
6. Wait for the paint to dry, then flip the wood over. Measure the half way point near the top and make a mark with your pencil.


7. Hammer on your picture hanging hardware. (I got mine from Michael's.) Then you have one tile all done! Just keep going until you
Just hang them up and....
TA DA!

Three days, $50, and we have awesome wall art :)
i loved this since the first time i saw it, it's such a fun idea!
ReplyDeleteThis is a GREAT idea. I think it's amazing. You did a great job. Have you tried spelling words with your letters?
ReplyDeleteThat's great!
ReplyDeleteThis is amazing!!
ReplyDeletei love scrabble, and i love this decorating idea! great post!
ReplyDeleteI think this is great and just posted it to Pinterest. :-)
ReplyDeleteThanks Dixie! Oh how I love Pinterest :)
Deletecant wait to try this , I Love Letters!!!!!
ReplyDeleteOookayyyy sooo I am in love with your project. I love how great it looks, I love how you did it and I am thrilled that you shared it over at my blog party! Thank you so much for linking up and for the inspiration! I can't wait to look around your place some more!!!
ReplyDeleteJaime from crafty scrappy happy
This art is awesome! I've already pinned it!!
ReplyDeleteI absolutely love it, not to mention the entire room is beautiful! I featured your amazing artwork today! You can view it here http://designdininganddiapers.com/2012/02/features-from-link-up
ReplyDeleteThanks Taryn!
Deleteps I am featuring you tomorrow!!!! :o) thanks for linking up once again!
ReplyDeleteJaime from crafty scrappy happy
OM Gosh! I LOVE these - so cute!!! Pinning!
ReplyDeleteThis comment has been removed by the author.
ReplyDeleteWhat an amazing hanging art. This is a very clever and fun idea plus they look so good on the wall.
ReplyDeletecould you use a canvas instead of wood
ReplyDeleteI'm sure canvas would look great too. It would sure be easier to hang, and you could use a photo transfer technique instead of hand painting it like this: http://www.insideways.com/2012/03/diy-photo-to-canvas-transfer.html
Deletethank you i am going to get down tot he shops and buy some canvases now thanks this is so much help
Deletealso would it work if i used your technique where you just draw on the back of the paper and traced it on as you did for the wood
DeleteI think so... probably? Just make sure you put a lot of pencil on the back of the paper and press hard when you trace it. I would also suggest putting something hard behind the canvas if it's one of those framed ones where the canvas is stretched over wood - maybe a book?
DeleteI'd love to see pictures of your finished project if you feel like sending them. Good luck!! :)
thank you for the help i will put as much pencil on the back as i can and i will press hard :):)also if i can i will send some pictures in:)thanks
Deleteyes thank-you for all you help i will press hard ont he back of the paper and trace hard :):) if i can i will send some pictures in for you:):)thanks:):)
Deletecan you use mod podge to transfer to wood? But the thing is i dont know how, but i saw some similiar technicques they used a mod podge.
ReplyDeleteI've heard that you can use this technique - http://www.insideways.com/2012/03/diy-photo-to-canvas-transfer.html - to do it with mod podge, gel medium, or glue. I haven't tried it though... It might be a lot easier ;)
DeleteHi! Can anyone tell me how THICK the wood is and what type this is? I know it's 9 1/2 x 9 1/2 but I'm curious as to how thick I should get it or if anyone knows what kind of thickness is best for wall hanging?
ReplyDeleteHi there, to be honest I'm not 100% sure of the thickness we chose, but I'm almost sure it was between 1/2 and 3/4. Even if the wood I used was a little thicker, anywhere around 1/2 inch or 3/4 would be great for this project.
DeleteOkay! Thank you! Do you remember what type of wood this is? I noticed that some of the wood available has more grain than some others and I love the texture of this wood!
DeleteHmmm, I'm not completely sure, but I think it might have been a high quality pine. Basically, just look for a high quality light wood that doesn't have any knots and I bet you'll find something really similar. Are you going to make your own Scrabble tiles?? I'd LOVE to see photos :)
DeleteOkay great, thank you so much! And yes Ma'am! My best friends birthday party is tomorrow night and she LOVES scrabble related things so I want to make two tiles with her initials on them for her to hang in her home as an additional present. If I'm able to get a hold of the materials and make them I'll definitely send you pictures! Thanks again for all your help!
DeleteWhat a cute gift!! Good luck and have fun!
DeleteHere's a picture of the final pieces! Thanks again!
Deletehttp://i48.tinypic.com/v9pj8.jpg
OH MY GOSH!!! You must be the best friend ever - the tiles look great and I'm nuts for that cake! Beautiful!!
DeleteHow were you able to print the letters individually? I am doing something wrong. I want to surprise my husband with these.
ReplyDeleteHi Ksmommy! I used Microsoft Word to crop the image of all the scrabble tiles down to an individual tile then I stretched the individual tile image to the size I needed. You can use several different programs for cropping the individual letters - paint or photoshop would work too! When you stretch the individual letter it will look kind of blurry, but it should be clear enough to trace (steps 2-4). Let me know if you have any other questions!
DeleteSo cute! I'd love for you to join the Pinworthy Projects party! http://www.atkinsondrive.com/pinworthy-projects-link-party-12/
ReplyDeleteMy guess is that the wood was 1"x10"x8' which means it's real dimensions were somewhere around 3/4"x9 1/4"x8'. If you open the image in Paint and crop each individual letter and print at that size these would be perfect for 1"x8" board size. I plan on doing this very soon in my apartment but I am going to use the newer Command strips to hang them to make the job even easier. Also, a good tip to hang these is to use 3" thick Painters tape to line them up and evenly space them out. Just a thought. :) Thanks for such a great idea!
ReplyDeleteDo you know what the paint color on the wall is?
ReplyDeleteYep! On top is Elephant Skin and on bottom is Ashes, both by Behr. They're great colors that do really well in all kinds of light. I highly recommend them!
Delete